
I Spy Quilt
Are you a fan of the classic “I-Spy” game or books?
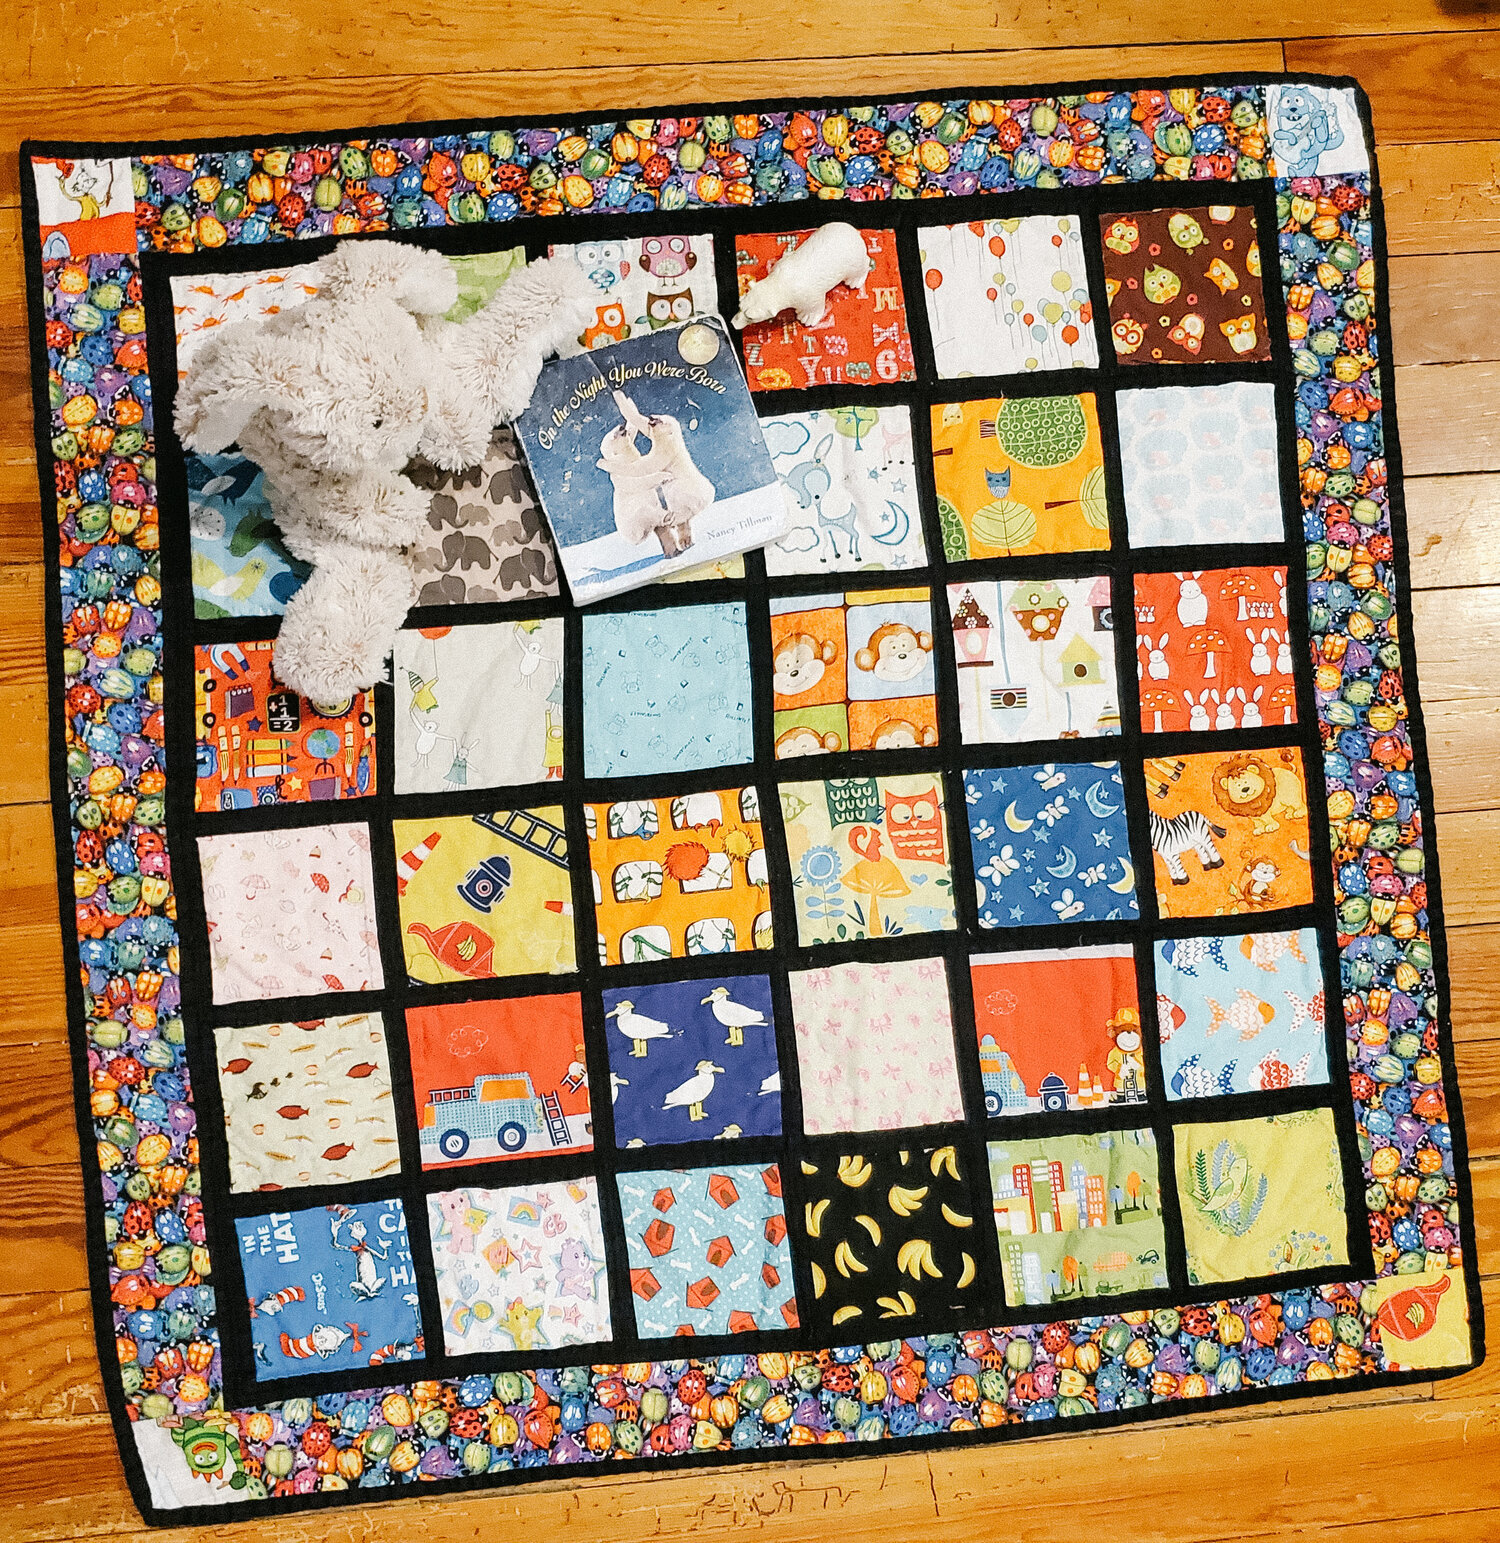
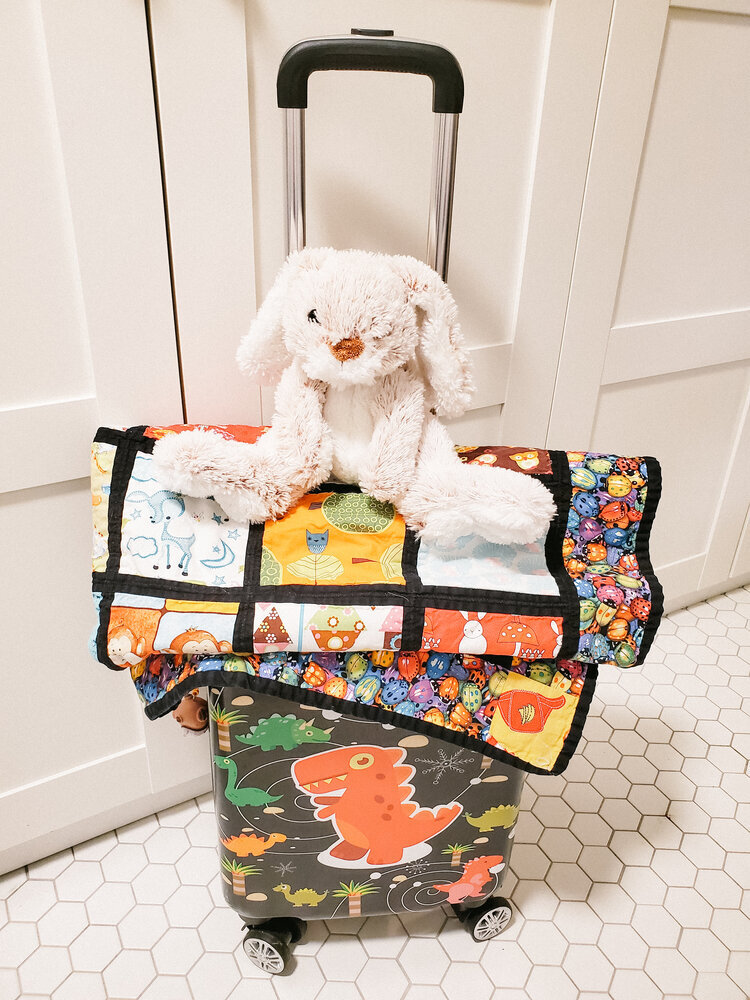
This interactive I Spy quilt takes the game to a whole new level. It is the perfect gift for a new baby, a youngsters birthday or a just because gift. It makes an ideal playmat and a lifesaver on car trips.
This I Spy Quilt takes the game to a whole new level. Our grandma (my amazing mama) always comes through with the best gifts and this one is among the top of our favorites. This quilt is often spread on the floor to play on top of and is often carried to the couch to snuggle up under. It is always a must-pack for road trips. On trips it serves a dual purpose as a blanket and a gameboard, which is a plus as things can be tight on a road trip with 5.

TO PLAY:
The blanket is spread out so the squares can be easily seen by everyone playing. If there are young players it is easier to limit the section to focus on. We used to focus on a corner or a single row of the quilt. After playing for a bit, you may be able to extend the playing field. One player is designated as the spyer. They secretly pick an item and say, “I Spy something…” and name the color of the item. The other players take turns naming items they see of that color. If they guess wrong the spyer says no and another guesser takes a shot. If they guess correctly, the spyer says yes and the role of the spyer rotates. If the other players are unsuccessful, the spyer may add additional tips. For example, “I spy something blue that is found in water” or “I spy something red that starts with the letter t.” Play will rotate among players being spyers and guessers.
TO CREATE:
I am very much a novice at sewing, please keep that in mind when reading the following description.
To create your own I-Spy quilt you will need the following materials:
- It is suggested to use a sewing machine as the process will be much quicker and more efficient
- 36 total 5 ½ x 5 ½ Fabric Squares of varying designs
- 1 ¼ inch sashing to line all of the squares (see the binding materials for additional measurements)
- 3 ½ inch border (could be same as backing)
- 4 total 3 ½ in squares for cornerstones
- Backing Fabric (1 ¼ or 2 ½ yards depending on quilting method)
- Binding material (if the same material is used for the binding and sashing you will need ⅞ of a yard)
- Basic sewing materials- thread, scissors, measuring tape

First, you will need to decide on the size of your quilt. Ours is about 39 inches wide. We find it to be an ideal size. It is perfect for a tummy time blanket, play mat and lap size for the car. You could adjust to make it any size that you wish though.
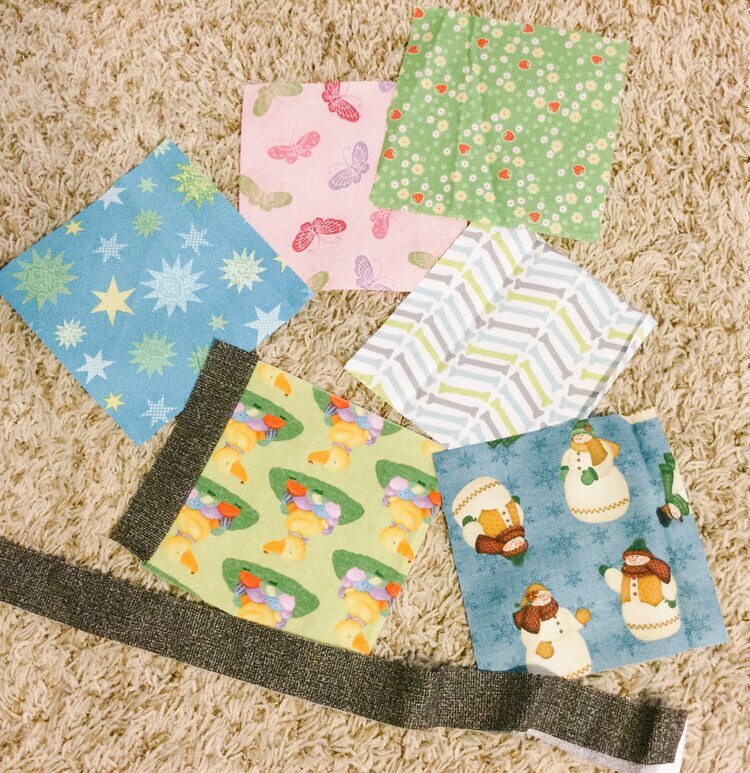
Next, you will need to find your fabric. Sometimes you can find variety packs of fabric that would work for an I Spy quilt. Sometimes it is already pre-cut which would be a bonus. You could also go through your scrap fabric. If you don’t sew but know someone that does, chances are they have a huge stash so hit them up. They would probably love to contribute to a fun project. My mom and aunt are my go-to people for fabric for any project. You’ll want to look for fabric of various colors with random objects on them. The more of a variety the better. Each square should be different.
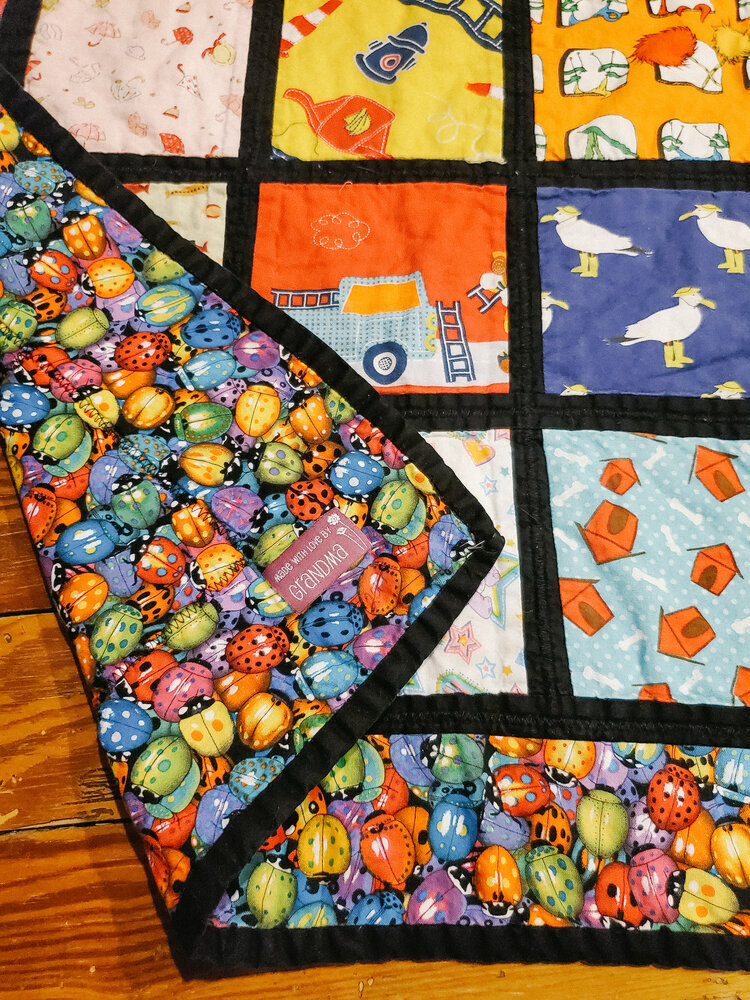
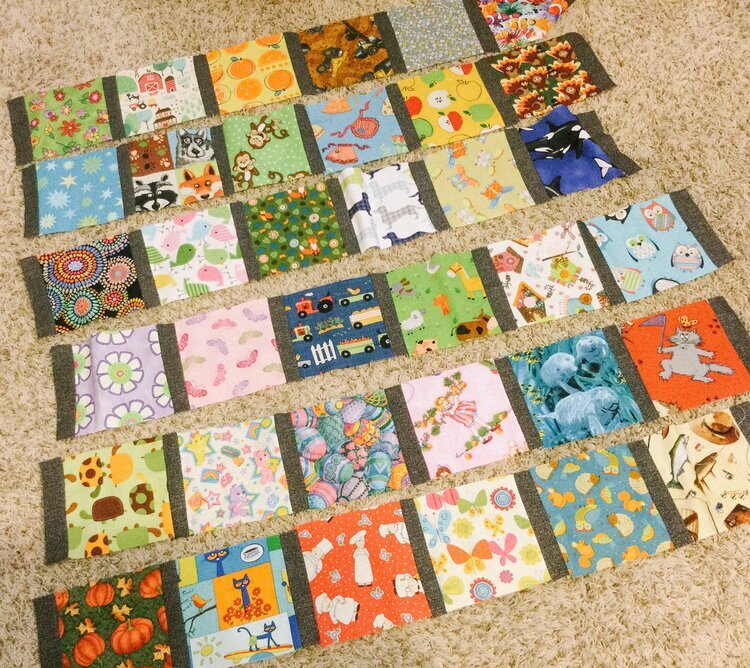
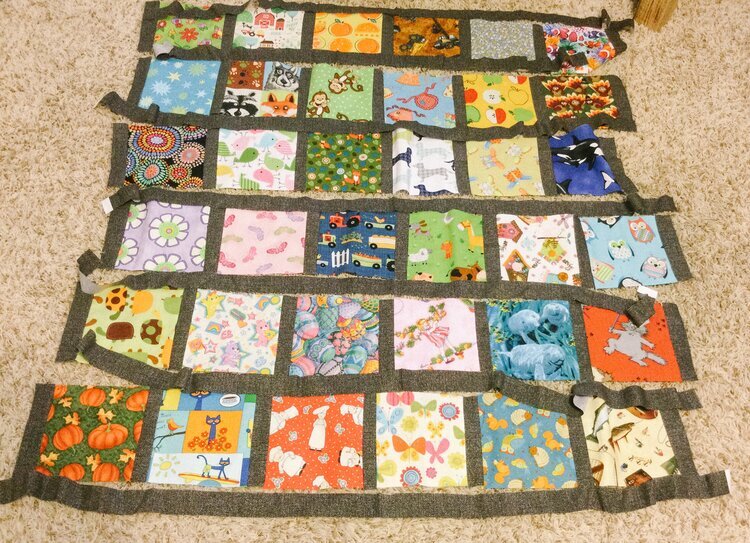
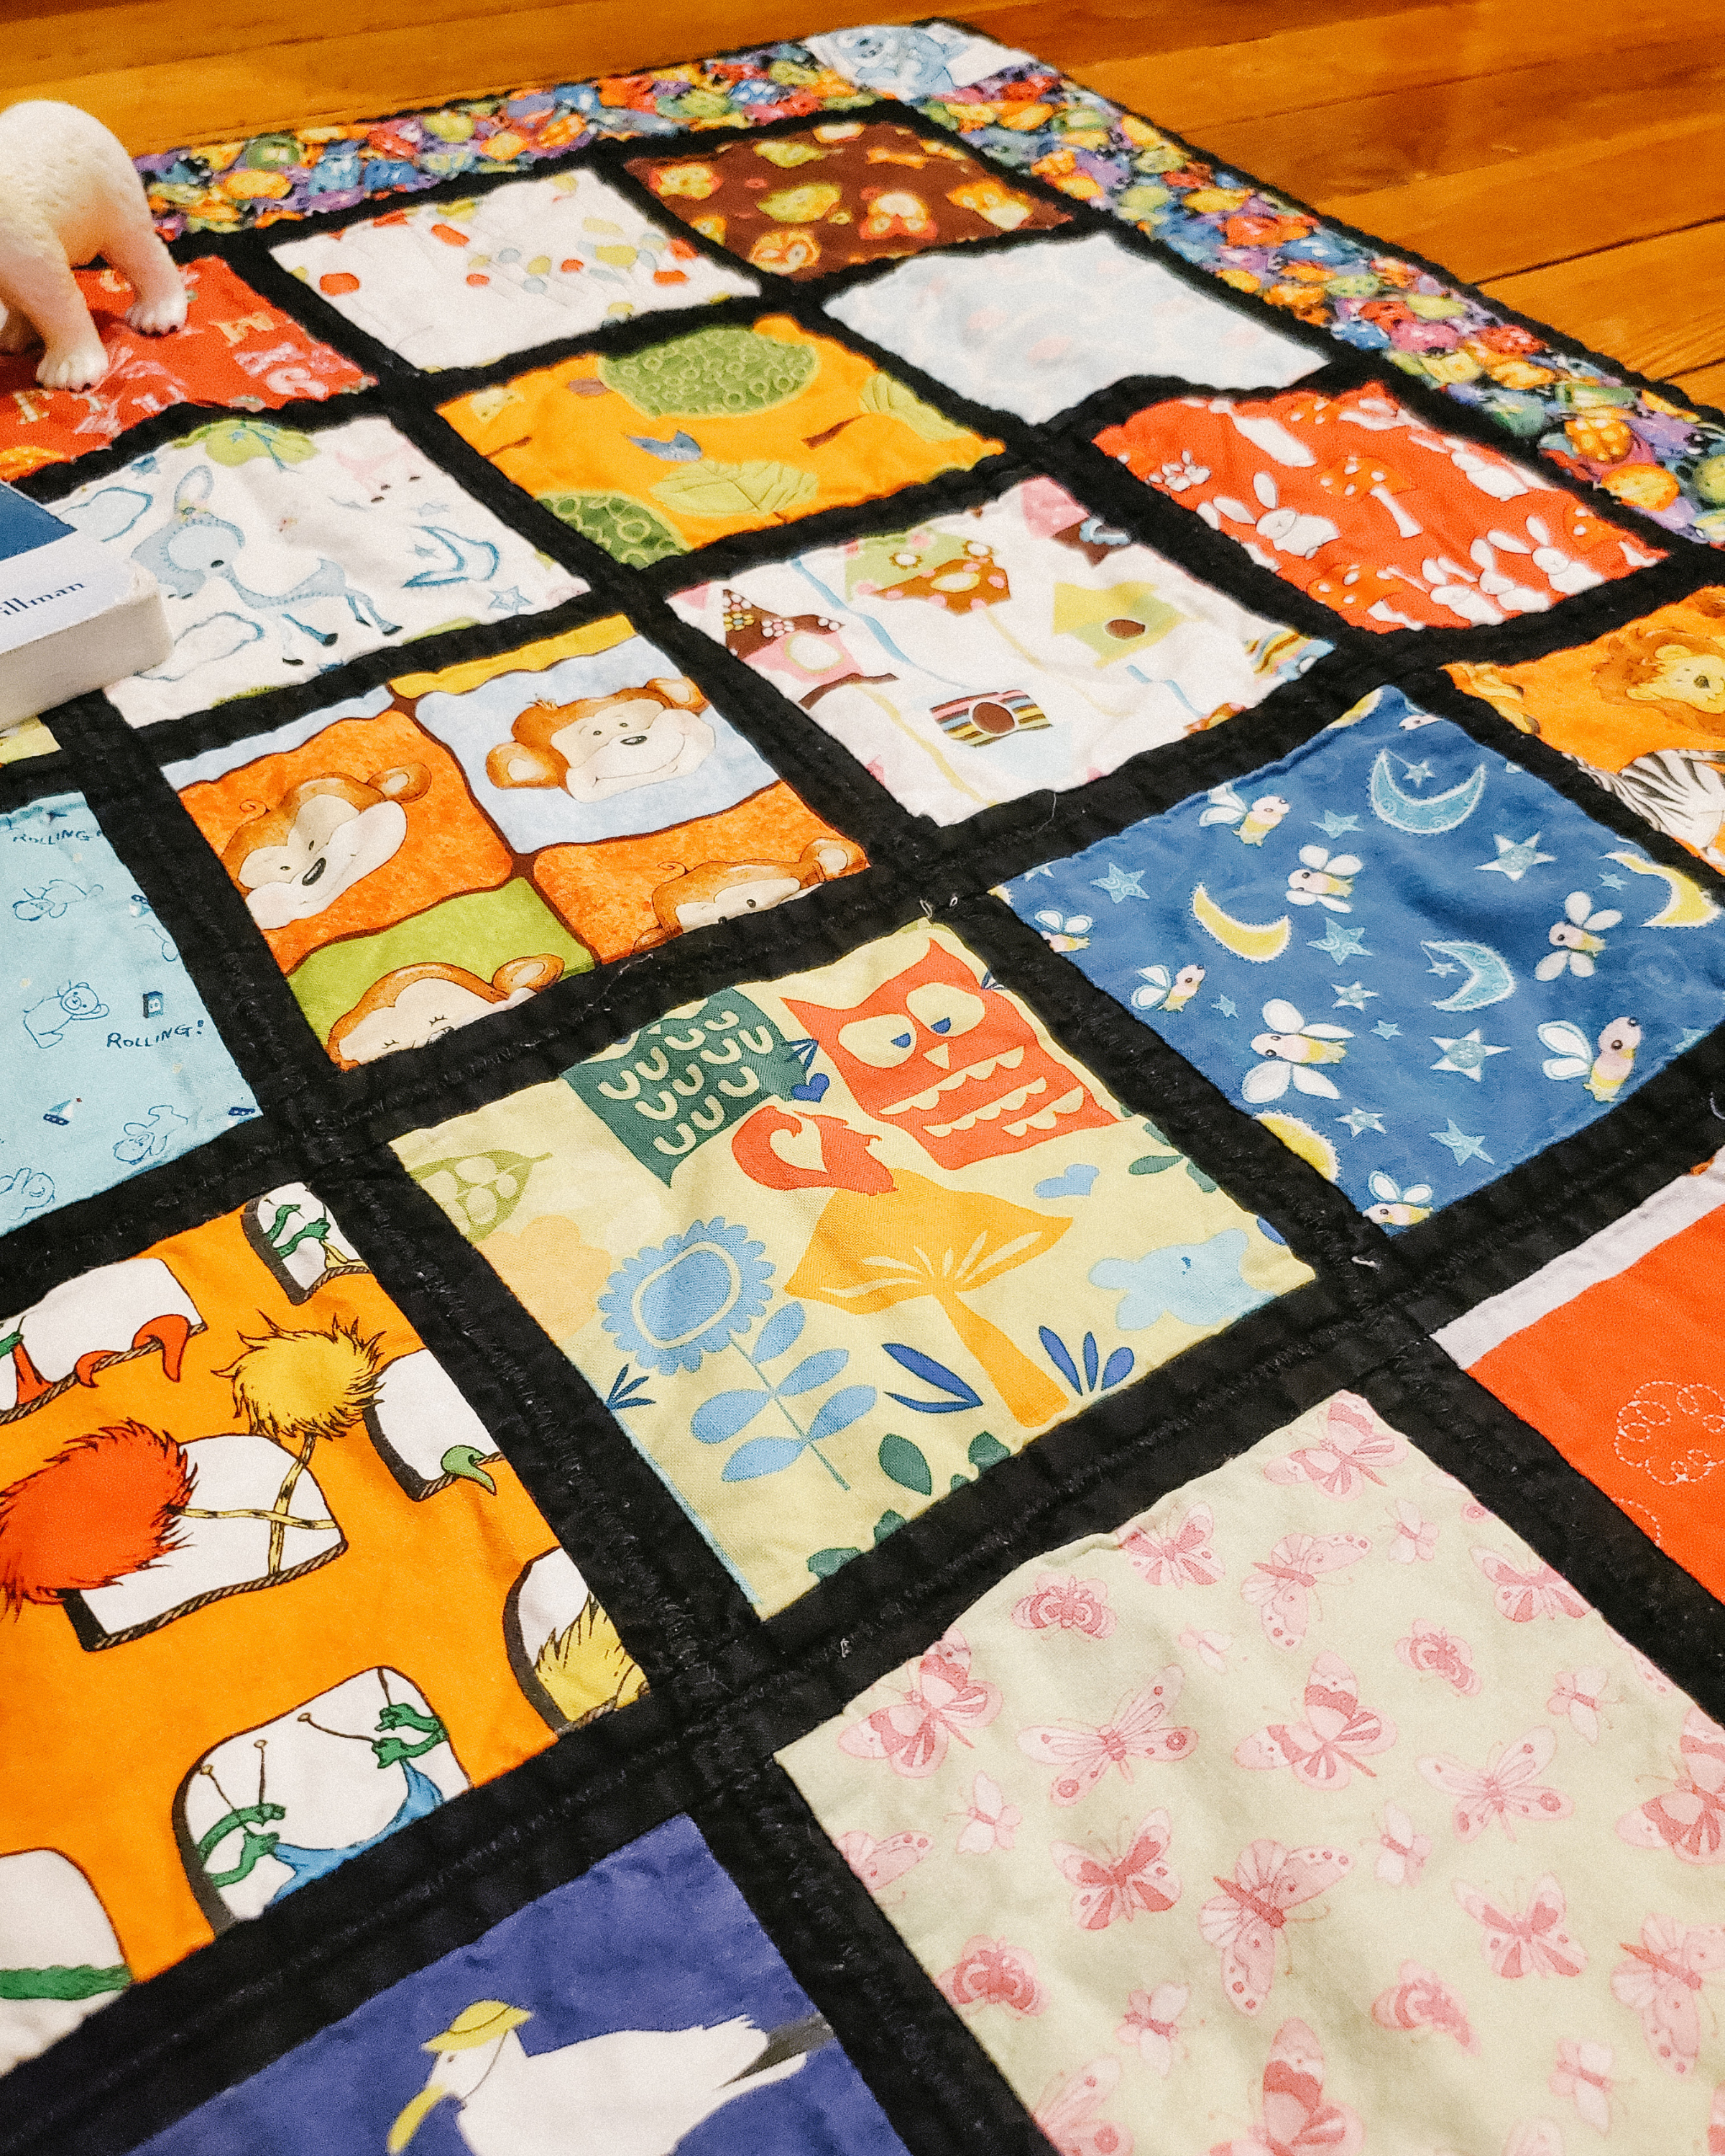
The I-Spy squares measure 5 ½ x 5 ½ and there is a 1 ¼ inch sashing (the border seen around the individual squares) in between. Our quilt uses black fabric for the sashing between the squares but any color would probably work as your fabric will include a variety of colors. Our quilt has 6 rows of 6 squares. You could make adjustments to this to fit your desired size. Our quilt also has a 3 ½ inch strip of the backing used as an outside border on all four sides of the quilt. She also included a random square in each corner to break it up as well (these are referred to as cornerstones). When it comes to the backing material, you have some flexibility with your choice. Our quilt has a colorful ladybug fabric and she recently made one with colorful letters. You could opt for a simpler solid backing as well. This really comes down to your preference or what you have on hand.
Lay the pieces of the quilt out to determine the order that you like best. Begin sewing strips together by rotating between a square and a strip of the sashing. If you are following the same dimensions of this quilt, you will have a strip of 6 squares with 5 solid sashing strips in between. Once you have 6 strips then it is time to sew those together. You will cut one long sashing piece to go in between the strips (33 ¾ x 1 ¼). Sew one row to one side of the sashing, then sew the next strip to the other side. Repeat this until all 6 strips are sewn together. Next, add the outside sashing 33 ¾ x 1 ¼ to the top and bottom and 35 ¼ in x 1 ¼ to the sides.

If you choose to use an additional border of the backing material you will add that next. The border pieces will measure 35 ¼ x 3 ½ for each side. Begin by sewing the sides of the border on. Then you will add the cornerstones to the top and bottom pieces of the border (measuring 35 ¼ x 3 ½ as well). Then attach the top and bottom border/cornerstone strips to the quilt.
Cut your backing material to size. You will add your quilting material in between the quilt top and the backing. To quilt you could keep it simple and use your sewing machine to sew along the sashing. You could use a quilting machine for a fancier design. If you do not have that capability there are many quilters that commission quilting services as well.
After piecing it all together and quilting it, you will just need to add the binding. This is the final edge around the entire quilt. You could use your choice of fabric for this as well. It may be easiest to use more of the backing material or the same color you used for the sashing used between the squares (as seen in our photos).
TO GIVE:
If you are up for the challenge, this quilt is a perfect gift! We were fortunate enough to receive ours as a treasured holiday gift one year. It would make for a perfect baby shower gift, birthday present or just because. My kids loved it so much that Grandma and my daughter worked together to make a doll sized version for her baby dolls. It is a unique gift that will be used for years on end.
Be sure to share this post with any family or friends who would enjoy it! You can save this post to Pinterest by simply pinning the image below.
If you create your own I Spy quilt be sure to come back and share it with others in the comments below or tag us on Instagram @playbeyondthelines!